

Building Ogre3D from Sources on Fedora 15
This is a little walk-through the whole build process of Ogre 3D rendering engine. It’s primarily for users of Fedora GNU/Linux distribution or any similar distro that uses rpms and yum. I chose the variant using cmake, so first thing you want to do is install cmake.
$ su -c 'yum install cmake cmake-gui'
After that there are also some prerequisites, that you need to install. For the Cg package you’ll need to enable rpmfusion nonfree repositary by writing
$ su -c 'yum localinstall --nogpgcheck
http://download1.rpmfusion.org/free/fedora/rpmfusion-free-release-stable.noarch.rpm
http://download1.rpmfusion.org/nonfree/fedora/rpmfusion-nonfree-release-stable.noarch.rpm'
Then install the dependencies using
$ sudo yum install gcc-c++ libXaw-devel freetype-devel freeimage-devel \
                   zziplib-devel boost-devel ois-devel Cg doxygen \
                   cppunit-devel
Some of them are optional, but I like to install them all, just in case. Since the hard-drive space is no longer an issue, it could save you from having to build it all over again. After that proceed to downloading the latest version of Ogre3d source and unpack it somewhere.
$ cd ~/Downloads
$ tar xjf ogre_src_v1-7-3.tar.bz2
This will extract the sources into a new directory. Let’s rename it to
source . Then we’ll need another directory where all the binaries will be
places. Let’s call it build . After that run cmake .
$ mv ogre_src_v1-7-3/ source/
$ mkdir build
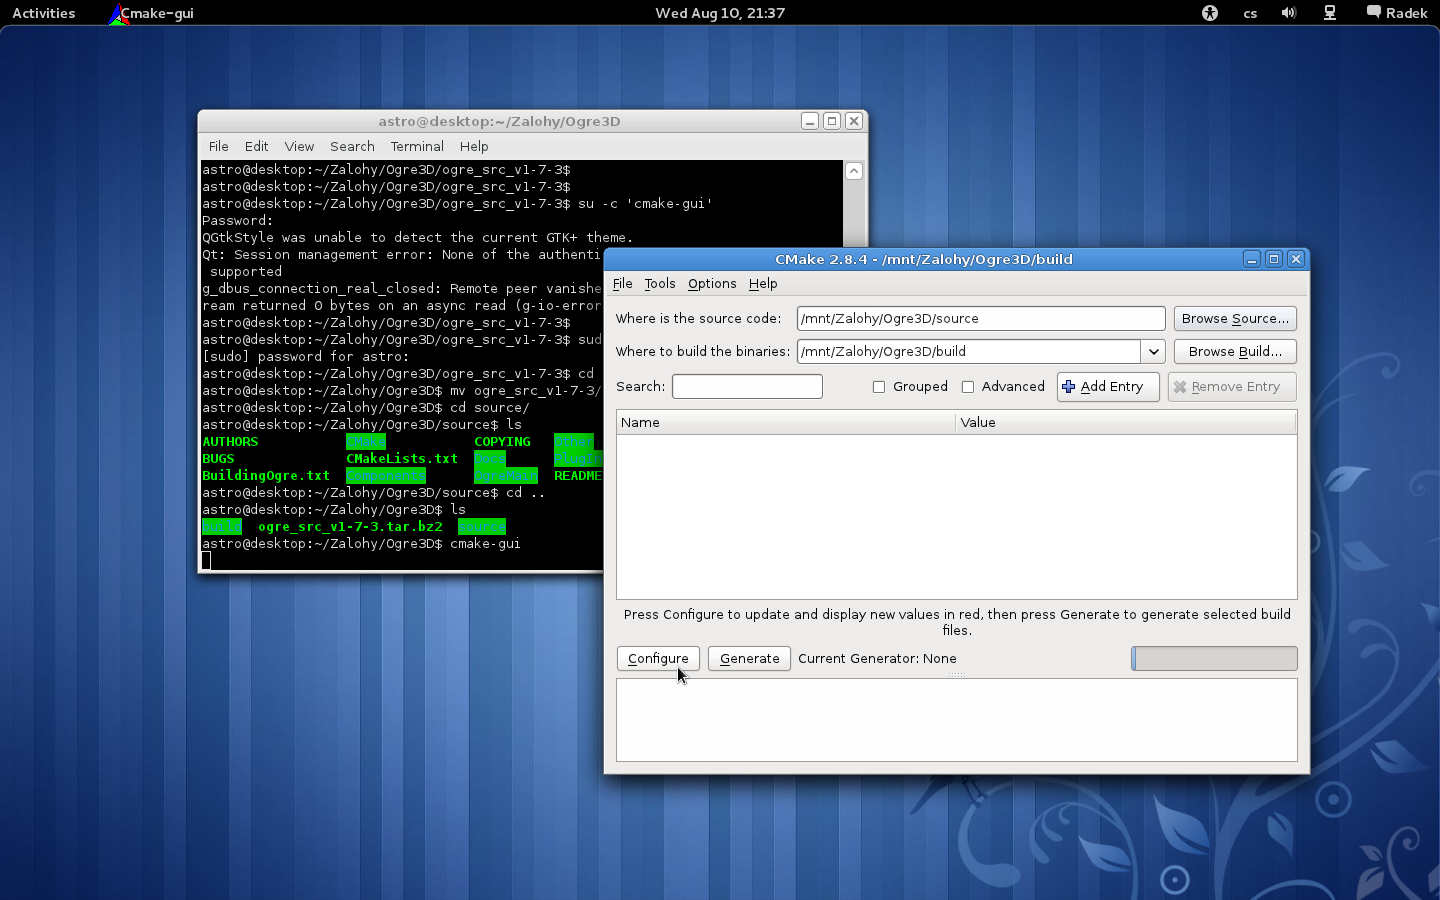
$ cmake-gui
In the gui set both paths to the source and to the build directory and hit Configure button, leave the defaults (Unix Makefiles and Use default native compilers).
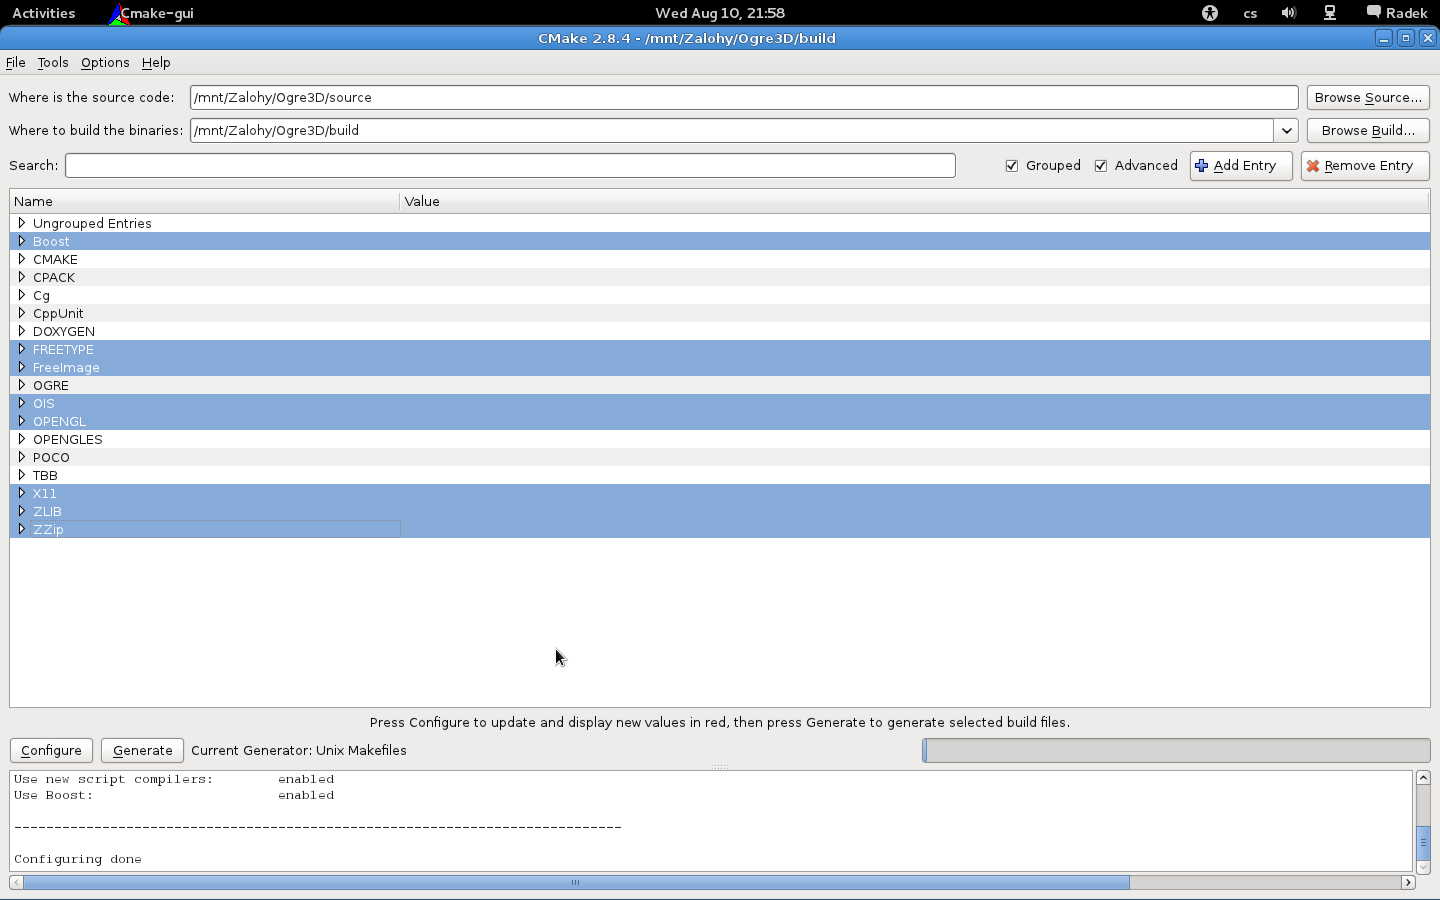
Check the Advanced and Grouped check-boxes and make sure you have installed everything you might need. If you compile ogre without some features here, you’ll need to do it all over again (I did it 4 times when I compiled Ogre for the first time). You should have installed zzip, zlib, freeimage, freetype, boost, opengl, X11, and ois. If you don’t, I highly recommend to install those libs and hit configure again. When you’re done, hit Generate.
At this point, we’re done with the cmake, you can close the window and get
back to your terminal window. Now we proceed to the building process itself.
Change to the build/ directory and run make to compile Ogre3D and wait.
$ cd build
$ make
There will be percentage coming up as the library builds. It takes (on my machine) a solid half-hour to build, so feel free to go get some coffee. The only thing left is installing the compiled library to your system using the classic
$ su -c 'make install'
Enjoy your Ogre!