
Setting up a Debian repository using dr

dr is a repository management tool that aims to simplify the process of releasing packages for smaller and niche projects based on Debian. From versioning and building your packges to managing releases and serving them to your users. This post explains how to set it up.
Given the variety of technologies, languages and build systems Debian supports, the packaging system became rather complex. That users can type a command and get a ready-made piece of software installed on their system is a result of strict processes and lots of different tools, many of which you might need to learn to create a package and set up a repository yourself.
dr hides away some of the flexibility of the system in favour of simplicity for the needs of small Debian-based projects that need a way of releasing and maintaining several customised packages on top of the distribution.
In a nutshell, dr takes your source package from a git repository, builds it and publishes it in it’s own archive that you can put up online for people to download the packages from. To learn more how it works, see the readme and project wiki on GitHub. And now, let’s see how to get it working.
Install
dr is still an experimental tool. I’m sorry if you come across any issues and would be grateful if you took time to report them here.
The main app is distributed via RubyGems and can be installed using the gem command:
sudo gem install drIt builds on top of many external tools, such as debootstrap, debuild and reprepro, which you should install too. On Debian, you’ll need the following packages (it can differ a little on Ubuntu and others):
sudo apt-get install git reprepro gzip tar devscripts \
                     debootstrap coreutils curl gnupg \
                     dpkg dpkg-sig sudo qemu-user-static \
                     rng-tools
Make sure all of these are installed before moving on to the next step.
Configure
You can configure dr at two places. Edit the /etc/dr.conf file for
system-wide settings and the ~/dr.conf for adjustments on per-user basis.
Both of them are simple YAML files and at the moment, there are only two
reasons you might want to change them.
Add build environments
dr comes with two predefined environments for building packages: Debian Wheezy and Kano OS. Chances are that you’ll need to build for other distros such as Jessie or Ubuntu as well. If so, you’ll have to define the build environment for your distribution of choice in the configuration. This step is important so your package is build against the correct set of dependencies.
Here’s how a build environment configuration may look like. The following one is for Debian Jessie:
build_environments
  name: "Debian Wheezy"
  arches: ["x86_64"]
  repos:
    wheezy:
      url: "http://ftp.uk.debian.org/debian/"
      key: "https://ftp-master.debian.org/keys/archive-key-7.0.asc"
      src: true
      codename: "wheezy"
      components: "main contrib non-free"
  base_repo: "wheezy"
  packages: []
Set the system-default repo
The number of dr repositories that can be hosted on the same server is unlimited and there are often good reasons to have more than one: to have a staging and production environments and to make your package available for several distributions perhaps. In such cases, you’d have to keep passing the path to the dr command to let it know where your repo is.
To make it easier, dr allows you to set up aliases for each repo and select a default one. It can be done in the config file as follows:
default_repo: "production"

repositories:
  - name: "production"
    location: "/home/radek/repos/production"
  - name: "backup"
    location: "/home/radek/repos/backup"
This configuration defines names for two repositories, production and
backup, and makes the former the default one. It’s not necessary to set up
names for your repositories if you don’t want to, but then you’ll have to type
dr --repo=~/repos/production with every command invocation.
Initialise a repository
With dr successfully installed and configured, it’s time to initialise your first repo. During the process, dr will, create the basic directory structure and generate signing keys.
Before going forward, start the following command which will make sure there is enough entropy available on the system when the GPG pair is generated:
sudo rngd -f -r /dev/urandomKeep rngd running in the background, pick a good place to put the repo on your file system and start the initialisation:
dr init ~/exampledr will ask you to fill in a few details about the repository such as, to pick the architectures it should support and select the default build environment. It may look something like this (the yellow values in the brackets are the defaults that will be used if you leave the field blank):
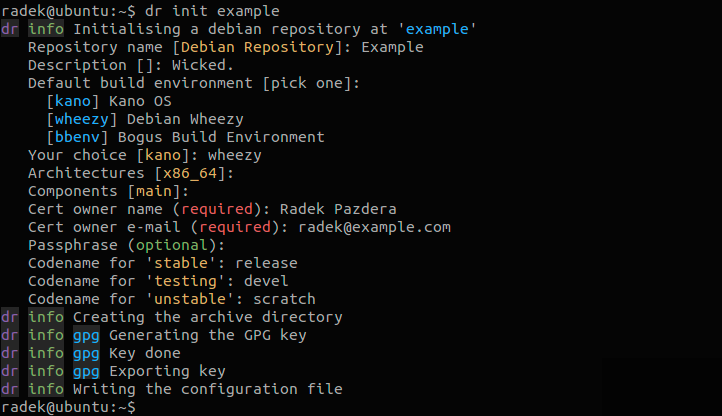
It’s important to get these right, because most of these cannot be changed later on and you might have to recreate the repository from scratch in case of error.
The Build environment and Architectures options depend on the target distro of your repository on which the packages are ment to be installed on. This could be Debian or any flavour of it, perhaps Ubuntu or Mint and it’s currently limited to one per repository. If you want to distribute your package to both Debian and Ubuntu, you’ll need to set up two separate repos. If the build environment isn’t correct, your package may be built against the wrong set of libraries and might not be compatible with the target system.
Select as many architectures as you like, but keep in mind that each package will be built for each architecture separately, which can increase the build times.
You may group your packages into several Components and release in three Suites, to each of which you can assign a Codename. Please refer to Debian’s official manual to learn what they mean exactly.
Add and build
Once the repository has been set up to your needs, we can proceed to adding packages into it. dr is most useful when you keep your sources in git. If yes, just pass the URL of the repo to it using the following command:
dr add --git [email protected]:KanoComputing/kano-toolset.gitdr will clone the repository, look through the packaging files which must
be present in the debian/ folder and get it ready for building.
This guide doesn’t cover how to prepare your sources to be compiled into a Debian package. Please refer to the official guide instead.
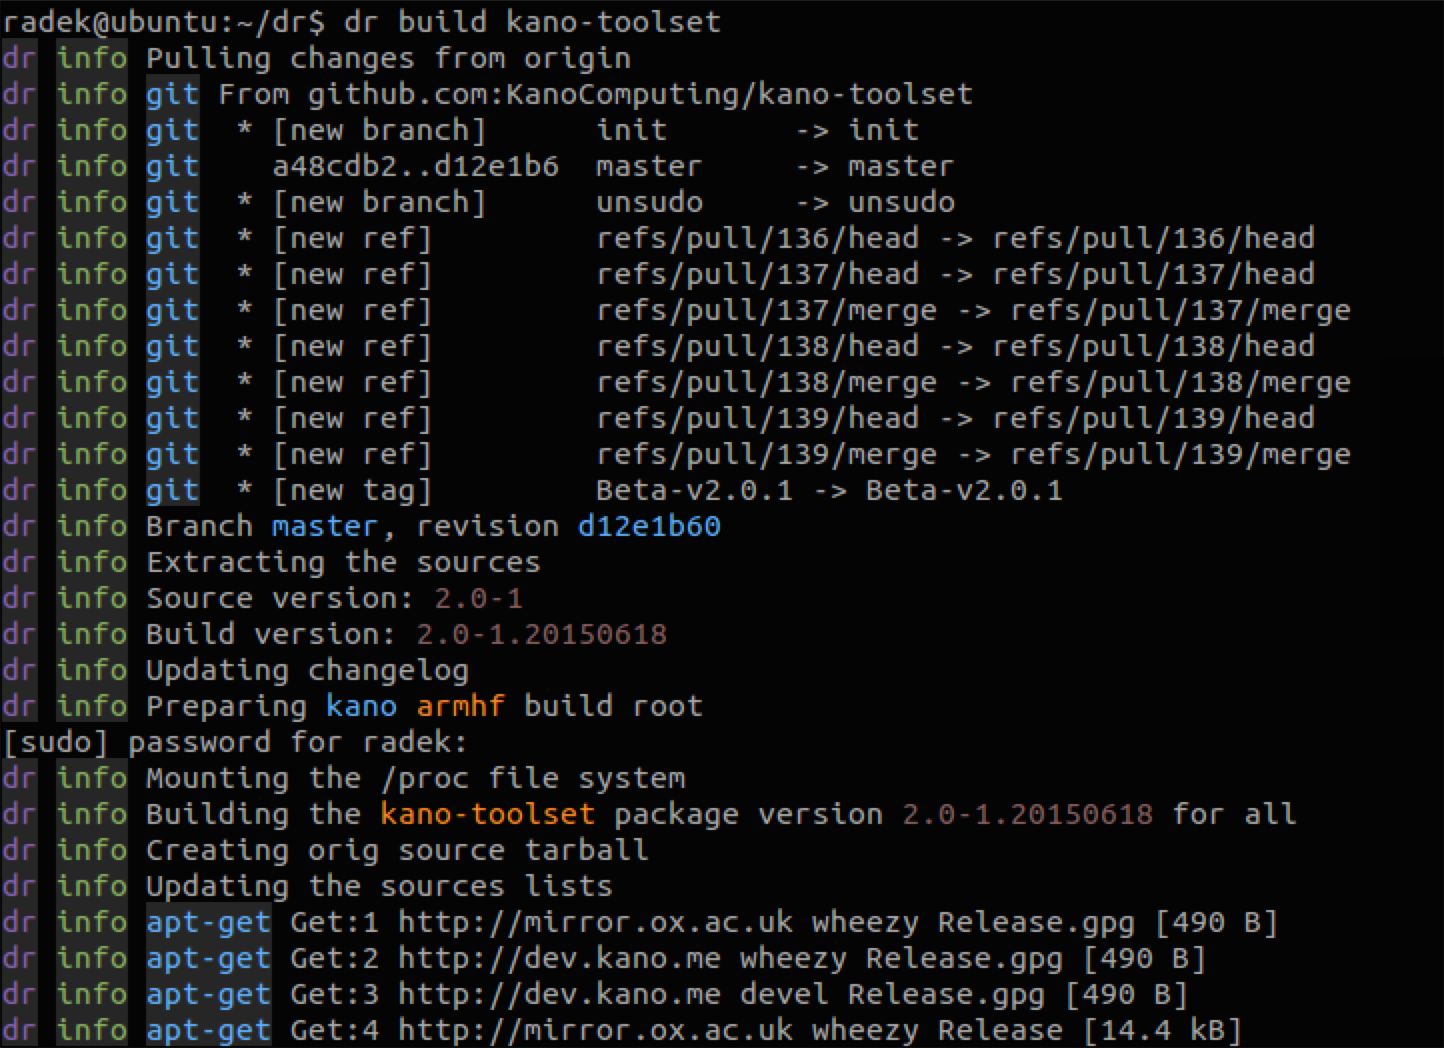
To actually build your package, run the dr build command as follows:
dr build kano-toolsetThe very first time you build a package with a new repo, the build will take a long while because dr needs to set up the buildroots. They are cached, so it will be much swifter next time.
Before each build, dr runs git pull to make sure the sources are up to
date and it won’t build again if nothing changed from the last one. You also
don’t need to worry about vesioning. dr appends a date-based build tag to
the version string, which will make each subsequent build of your package
compare higher than the previous one, forcing apt to reinstall it (unless
you downgrade the upstream or deb versions).
Both of the commands have additional options. Check out the help to learn more:
dr help add
dr help build
Prebuilt packages
You can use dr to manage packages that were built elsewhere too. If
you prefer a different way of generating your *.deb files, you can still use
this app to manage them in a repository. Including them is just as easy.
Use the following command:
dr add --deb raspberrypi-linux_3.12.24-1.20141028_armhf.debdr will unpack the archive and get all the information it needs automatically. It will also sign it with the repository key.
Release
With the packages built, the next step is to push them into the archive - a
directory with a prescribed structure from where apt on your user’s machines
will be able to retrieve them. dr lets you to push your packages in three
suites:
- stable
- unstable
- testing
Remember, you have assigned a codename to each of them when we started. You
can push a build in one or more of these suites. The only limitation is that
there cannot be two builds of the same package in the same suite. That’s why
there are more of them. For example, if you want to ship the throughly tested
version of kano-toolset_1.3 to users, you’d push it into the stable suite.
But you might want to release a newer one for testers too, in which case it
would go to unstable. And when you’re working late at night on something
highly experimental that you need to test, you can push it to scratch and
conveniently install on your test box in the lab.
This is how to push a package to push a package into a suite:
dr push kano-toolset --build 2.0-1.20150522 --suite unstableThe builds can be moved around, so you can push the new version from unstable to stable after it got enough testing without rebuilding it and risking a random bug. Since that is a common scenario, there’s a dedicated command to push packages from unstable to stable:
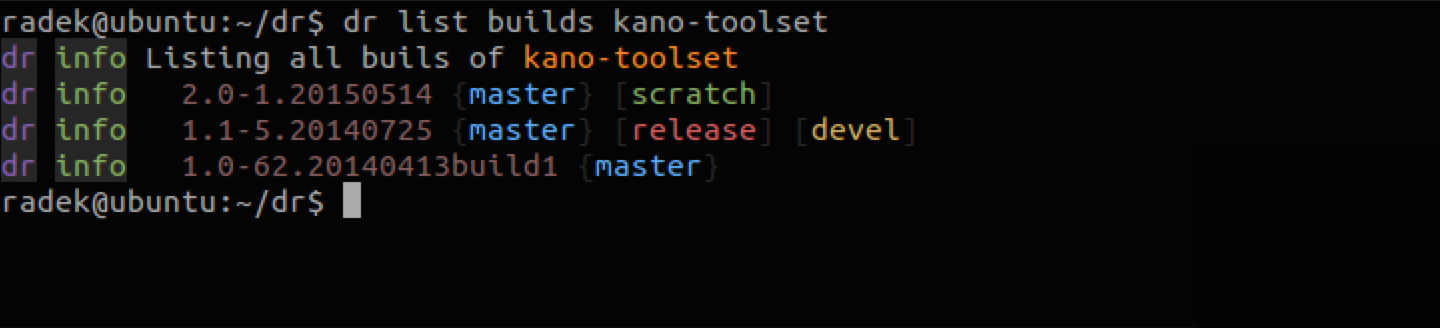
dr release kano-toolsetYou can use the list command dr help list to display what builds of
the package are where:
Publish the archive
Once you get your package built and pushed into at least one suite, you’ll need to publish the archive on the internet to make it accessible for other people.
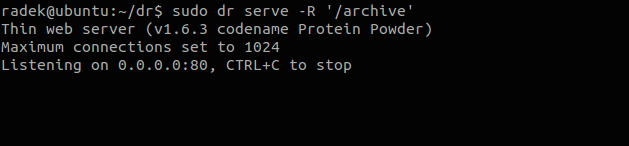
dr comes with a basic web server built in. Use this command to start it:
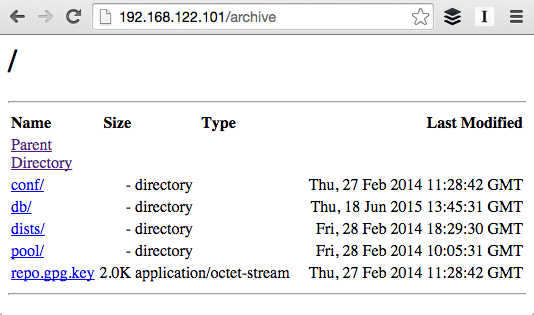
sudo dr serve -R /archiveBy default, it will bind to 0.0.0.0:80 for which root permissions are required
(hence the use of sudo). Use the -R option to specify the root route on
the server.
And this is how it looks in the browser:
Use the repository
When the server is up and running, the final step is to figure out how to use it to install packages and what to tell the users if they want to access the repo.
There are three entries that you can put into your source.list, based on
which suites you want apt to use:
deb http://192.168.122.101/archive stable main
deb http://192.168.122.101/archive unstable main
deb http://192.168.122.101/archive testing main
Using all of them at the same time is fine; apt will always get the latest version of each pacakge.
Apart from that, you’ll need to add the repository’s public key into your key ring. Notice the repo.gpg.key file in the screenshot above. To add it use this command:
curl http://192.168.122.101/archive/repo.gpg.key | apt-key add -And that’s it, the only thing that separates you now from installing the
package on your system is running apt-get update:
sudo apt-get update
sudo apt-get install kano-toolset
Conclusion
So this is how you make a Debian repository with dr. Thanks for sticking with this monster of a tutorial till the very end. I hope you found it useful!
If you want to know more, there are other resources available on the project wiki giving a little more detail. In case you’re unsure about something or run into problems, you’re more than welcome to ask on our gitter channel or open an issue on GitHub.