
Manipulating git repositories with Node.js
What do linting, building and testing have in common? They all work best when automated. With services like GitHub’s webhooks, it’s easy to subscribe to certain events on your repository and be notified by a HTTP request. These might be commits being pushed or pull request landing at your repo when you can trigger a build or run your tests.
Apart from a webhook, you’ll need a server that will listen at the other end to make it work. Node.js with Express are pretty good at handling requests and you can have them up an running in minutes. What’s left is processing the repository itself.
This post is about how to do that with Node.
Meet nodegit
A quick search through npm reveals no
shortage of packages that provide access to the functionality of git in
Javascript either by wrapping around the git binary or implementing the
functionality directly.
The one that caught my eye is nodegit — native bindings to the libgit2 library made by GitHub. The package gets lots of development activity and seems to be well supported.
You can install it as any other Node.js package using npm:
npm install nodegitThe maintainers provide pre-built binaries of libgit2 for the most common architectures. However, if yours isn’t amongst them, the installer might need to build the library from source and you’ll be required to install a C toolchain to proceed.
Done installing? Let’s take a look at a few examples. There’s quite literally a million things you can do with nodegit, and while this post can’t possibly cover everything, we’ll go though a few to give you an idea of how the library works.
All the snippets below were made with nodegit 0.5.0. When in doubt, please refer to the official API docs.
Clone a repo
The first step is pretty obvious: you can hardly do anything with the repository without cloning it first. To do that, we’ll use the Clone class:
var nodegit = require('nodegit'),
    path = require('path');

var url = "https://github.com/pazdera/scriptster.git",
    local = "./scriptster",
    cloneOpts = {};

nodegit.Clone(url, local, cloneOpts).then(function (repo) {
    console.log("Cloned " + path.basename(url) + " to " + repo.workdir());
}).catch(function (err) {
    console.log(err);
});
Cloning will return an already initialised handle to the repository (an instance of the Repository class) that you can use to access its contents.
The library uses promises to manage the asynchronous calls. If you’re unsure
what the weird chain of .then() and .catch() functions mean, checkout this
quick introduction.
Authentication
In case your repository isn’t openly available, you may need to authenticate
via http or ssh. Nodegit can do that via
CloneOptions that you can pass to
Clone as an argument. Like this:
var cloneOpts = {
  fetchOpts: {
    callbacks: {
      credentials: function(url, userName) {
        return nodegit.Cred.sshKeyNew(
          userName,
          '/Users/radek/.ssh/id_rsa.pub',
          '/Users/radek/.ssh/id_rsa',
          "<your-passphrase-here>");
      }
    }
  }
};
The credentials function is called when the remote requests authentication.
The implementation will vary for http, ssh and other types of authentication.
Check out the Cred class in the docs for
more ways to authenticate.
Open it up
If you already have a local copy of the repo, you can open it with nodegit using the Reposiotory#open function:
var nodegit = require('nodegit');

nodegit.Repository.open('./scriptster').then(function(repo) {
  console.log("Using " + repo.path());
}).catch(function (err) {
  console.log(err);
});
Just as Clone, it returns an instance of Repository that you can use to
manipulate it.
Read the commit history
One thing that you may need is going through the last few commits on a branch and extracting metadata from each one. This can be done through the Commit#history event emitter that iterates through the revisions, generates events for each commit along the way and returns an array of all the Commit objects at the end.
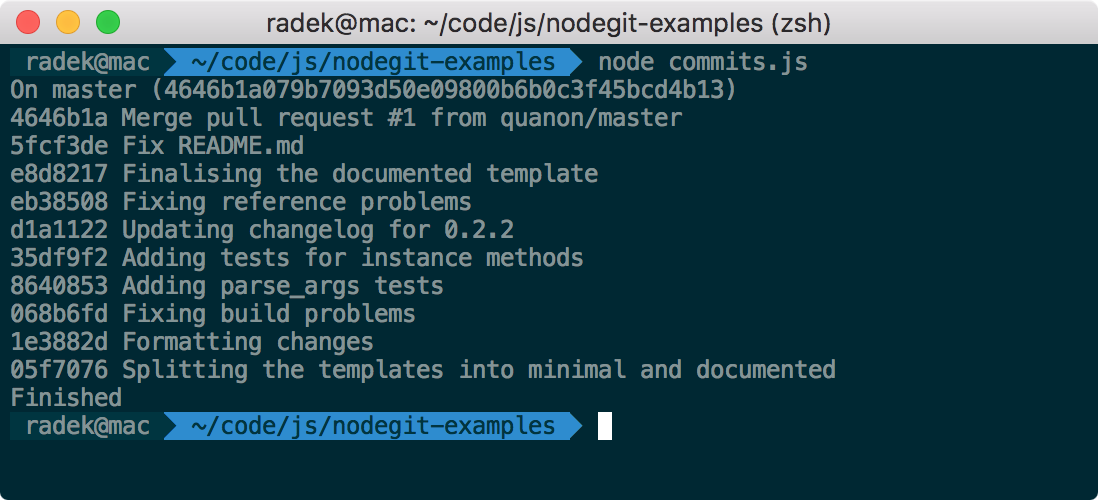
The following promise chain will retrieve the name of the current branch, walk through its history and print the hash and commit messages for the last 10 commits on it:
var nodegit = require('nodegit');
var Promise = require('promise');

nodegit.Repository.open('./scriptster').then(function(repo) {
  /* Get the current branch. */
  return repo.getCurrentBranch().then(function(ref) {
    console.log("On " + ref.shorthand() + " (" + ref.target() + ")");

    /* Get the commit that the branch points at. */
    return repo.getBranchCommit(ref.shorthand());
  }).then(function (commit) {
    /* Set up the event emitter and a promise to resolve when it finishes up. */
    var hist = commit.history(),
        p = new Promise(function(resolve, reject) {
            hist.on("end", resolve);
            hist.on("error", reject);
        });
    hist.start();
    return p;
  }).then(function (commits) {
    /* Iterate through the last 10 commits of the history. */
    for (var i = 0; i < 10; i++) {
      var sha = commits[i].sha().substr(0,7),
          msg = commits[i].message().split('\n')[0];
      console.log(sha + " " + msg);
    }
  });
}).catch(function (err) {
  console.log(err);
}).done(function () {
  console.log('Finished');
});
Here’s the output in the terminal:
Checkout a different branch
Besides manipulating metadata, nodegit has no problems working with trees.
You can check out different branches, modify your files and even create new
commits. For the sake of keeping the examples simple, this is how you checkout
a branch:
var nodegit = require('nodegit');
nodegit.Repository.open('./scriptster').then(function(repo) {
return repo.getCurrentBranch().then(function(ref) {
console.log("On " + ref.shorthand() + " " + ref.target());
console.log("Checking out master");
var checkoutOpts = {
checkoutStrategy: nodegit.Checkout.STRATEGY.FORCE
};
return repo.checkoutBranch("master", checkoutOpts);
}).then(function () {
return repo.getCurrentBranch().then(function(ref) {
console.log("On " + ref.shorthand() + " " + ref.target());
});
});
}).catch(function (err) {
console.log(err);
}).done(function () {
console.log('Finished');
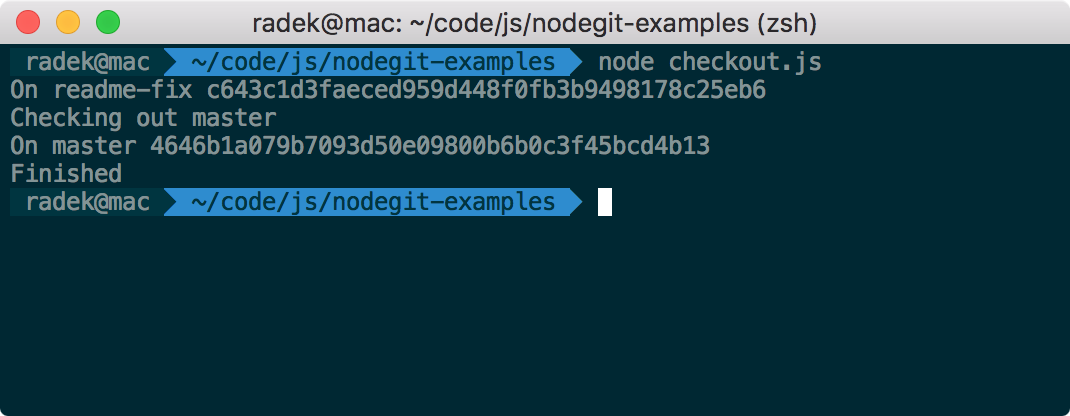
});All the work here is done by the Repository#checkoutBranch function, the rest is just printing the name of the current branch before and after the checkout.
Note that you need to specify a preferred checkout
strategy. I picked FORCE
which will ditch any local modifications of the working tree in favour of the
version from the repository.
The output of the above should look something like this:
Search through the tree
When you clone a repository with nodegit, it will look exactly the same as if
you did it with the git command and you can read and modify the working tree
as you wish.
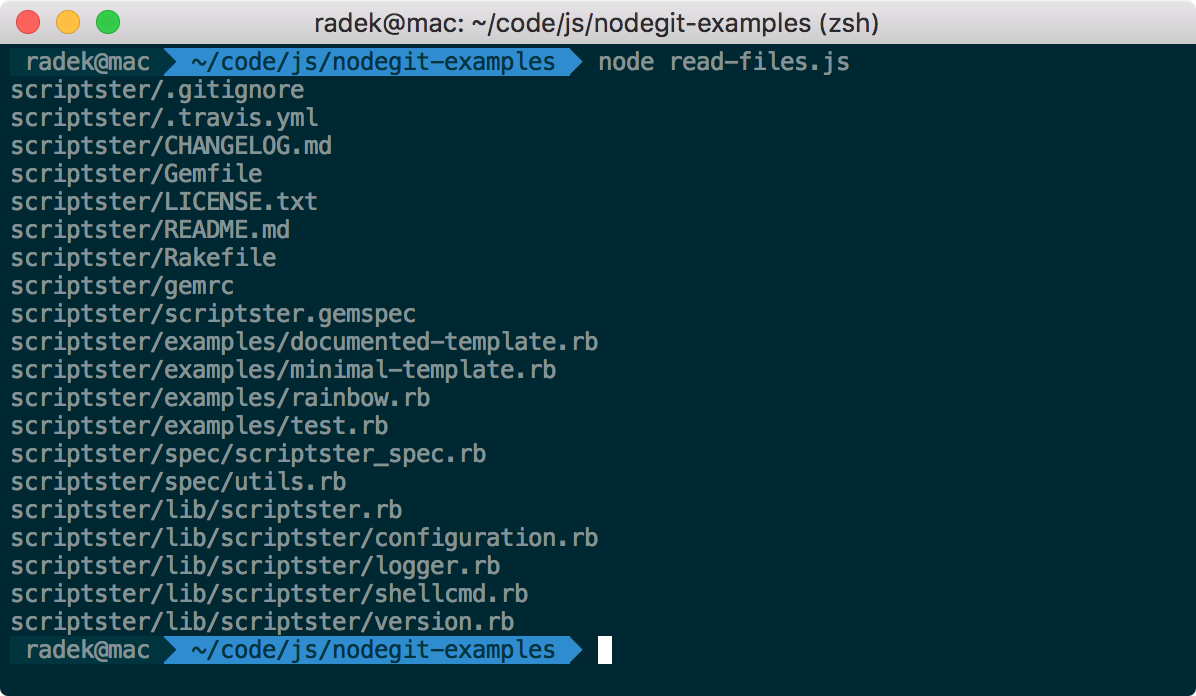
Here’s an example that will print all the files from the scriptster repo that I cloned earlier:
var rr = require("recursive-readdir");

rr("./scriptster", ["scriptster/.git/**"], function (err, files) {
  for (var i = 0; i < files.length; i++) {
    console.log(files[i]);
  }
});
For simplicity, it uses the
recursive-readdir module
from npm and ignores all the files within the .git/ directory. Here’s the
output:
Summary
This was nodegit, a useful library if you need to manipulate git repositories with Node.js. Under the hood, its calling GitHub’s libgit2 to do the heavy lifting. It works particularly well if you need to automate various parts of your workflow — like building, testing and deployment using git on your server.
It’s open-source, distributed under the MIT licence (libgit2 is licensed under GPLv2). Do get in touch with the maintainers if you’d like to contribute!
If you liked the article, please give it a thumbs up on Hacker News or Reddit. Thanks!