Bringing the best of Bash scripting to Ruby
Bash scripts are efficient and incredibly powerful, until things get out
of hand. Then, you may find yourself piping the output of ifconfig though
grep, two seds and awk while pulling your hair out in clumps. It’s often hard
to justify using a more advanced scripting language for what seems like a small
task when they’re nowhere near as efficient as bash in the beginning.
Small tasks, as they do, grow bigger and at some point a major rewrite of your original bash script will be in order. But could it be avoided? This post explores bringing the initial simplicity of bash into Ruby scripts while keeping them flexible enough that you won’t go mad when things get more complicated.

Speed is absolutely crucial when it comes to scripting. Writing a script shouldn’t feel like it’s taking longer than it would if you’d just kept clicking for a few hours and done it manually. Bash is excellent at that for small tasks.
Unfortunately, speed goes against the other desirable qualities, which are reusability and extensibility. The more carefully you make the script from the start, the more time you might save, reusing it on a similar problem in the future. That, of course, takes time and using Ruby can help you save a great deal of it.
Below are the two gems that I use to make my Ruby scripts as simple as bash. And much easier to read and extend.
Docopt for CLI arguments
Being able to quickly modify the interface of the script without having to jump through the hoops of OptionParser is really useful. Options, arguments, subcommands, both mandatory and optional are incredibly easy to add using docopt. You’ll know how to use docopt right when you first try it. Here’s an example:
require 'docopt'

doc = <<DOCOPT
Print images in the terminal.

Usage:
  catpix --help | --version
  catpix [options] <path>

Options:
  -w=<width>, --limit-width     Limit width of the image (factor of the size
                                of the terminal window) [default: 1].
  -h=<height>, --limit-height   Limit height of the image (factor of the size
                                of the terminal window) [default: 0],
  -c=<pos>, --center            Set x, y or xy centering in the window.
  -b=<colour>, --bg             Set background colour.
  -f, --bg-fill                 Draw background around the image as well.
  -r=<res>, --resolution        Either 'high' or 'low' [default: auto].
  --help                        Show this message.
  --version                     Print the version.
DOCOPT

begin
  args = Docopt::docopt doc
  puts args
rescue Docopt::Exit => e
  $stderr.puts e.message
  exit 1
end
It’s a simple domain-specific language which mimics the typical usage strings of applications. You write the help message and the library will take care of the rest. It really is that simple: find out more about it in one of my previous posts.
scriptster
The other part of my setup is Scriptster, a small gem that only has two functions:
- Launch shell commands.
- Log what happened.
It’s based on the lazy assumption that for scripting purposes, it’s worth
sacrificing some performance for convenience. Scripter’s cmd method lets you
interface with shell commands easily and in controlled manner. The log method
gives you a basic logger to record the progress of your script with timestamps
and also colours.
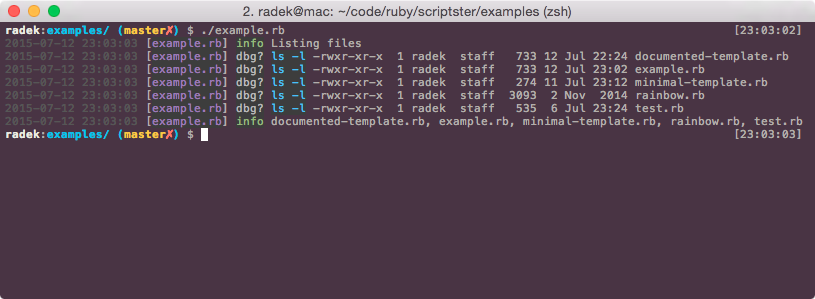
The idea is to hide as much boilerplate as possible behind a minimalistic interface that is focused what you need for scripting: run a command, see how it went and maybe process the output. Check out this simple example:
require 'scriptster'
include 'Scriptster'

log :info, "Listing files"
ls = cmd "ls -l | grep -v '^total'",
  show_out: true,
  out_level: :info,
  tag: 'ls -l'

files = []
ls.out.lines.each do |line|
  files.push line.split[-1]
end

log :info, files.join(', ')

To learn more about scriptster, see one of my previous posts.
Putting them together
Combining these two gems together gives you a good basic setup. Scripter conveniently provides a wrapper for docopt, so using them both will amount to the following boilerplate:
#!/usr/bin/env ruby

require 'scriptster'
include Scriptster

args = parse_args <<DOCOPT
Usage:
  #{File.basename __FILE__} [-h]

Options:
  -h, --help          Show this message.
DOCOPT

log :info, "Args received: #{args}"
ls = cmd 'ls', {show_out: true, out_level: :info}
While 10 lines of code aren’t many, it’s still annoying having to remember even that. To save some of your memory, try using a function similar to this:
new-ruby-script()
{
    if [ -n "$1" ]; then
        local script="$1"
    else
        local script=`mktemp scriptster.rb.XXXX`
    fi

    local url="https://raw.githubusercontent.com/pazdera/scriptster/master"
    curl "$url/examples/minimal-template.rb" >"$script"
    #curl "$url/examples/documented-template.rb" >"$script"

    chmod +x "$script"
    $EDITOR "$script"
}
This will download the minimal
template
from scripster’s git repo and start editing it (also check out the documented
version
which includes an overview of the functionality, in case you’re as forgetful as
I am). Just drop it at the end of your ~/.bashrc or ~/.zshrc file and
you’ll be able to start a script in a matter of seconds with the following
command:
new-ruby-script <file-path>
Summary
Using the setup above, you’ll be able to get things done with roughly the same speed you’d do when using just shell. But in case your program exceeds the initial expectations, you’ll have all the power of Ruby at your disposal.
Can the template be improved or made even simpler? Leave a comment below or submit a pull request here.

